

An SVG can look perfect in Figma and then arrive in WordPress with black colours, missing elements, incorrect button fills, or a cropped layout grid. The fastest fix is not to re-export blindly. First identify the visible symptom, then check the SVG property most likely to cause it: fill, stroke, viewBox, masks and clip paths, or the WordPress upload/sanitization step.
This is not a theoretical problem for my portfolio. During recent work on the Melkart Group, OnePage Pro, William Frenn, and Cybertivity case studies, several exported design-system graphics needed targeted cleanup before they displayed correctly on the live WordPress pages.
Quick answer: Test the raw SVG in a browser before uploading it. If it is already wrong, fix the Figma selection or export. If it breaks only inside WordPress, inspect how it is embedded, whether the theme or widget controls its colour, and whether sanitization removed something the artwork depends on.
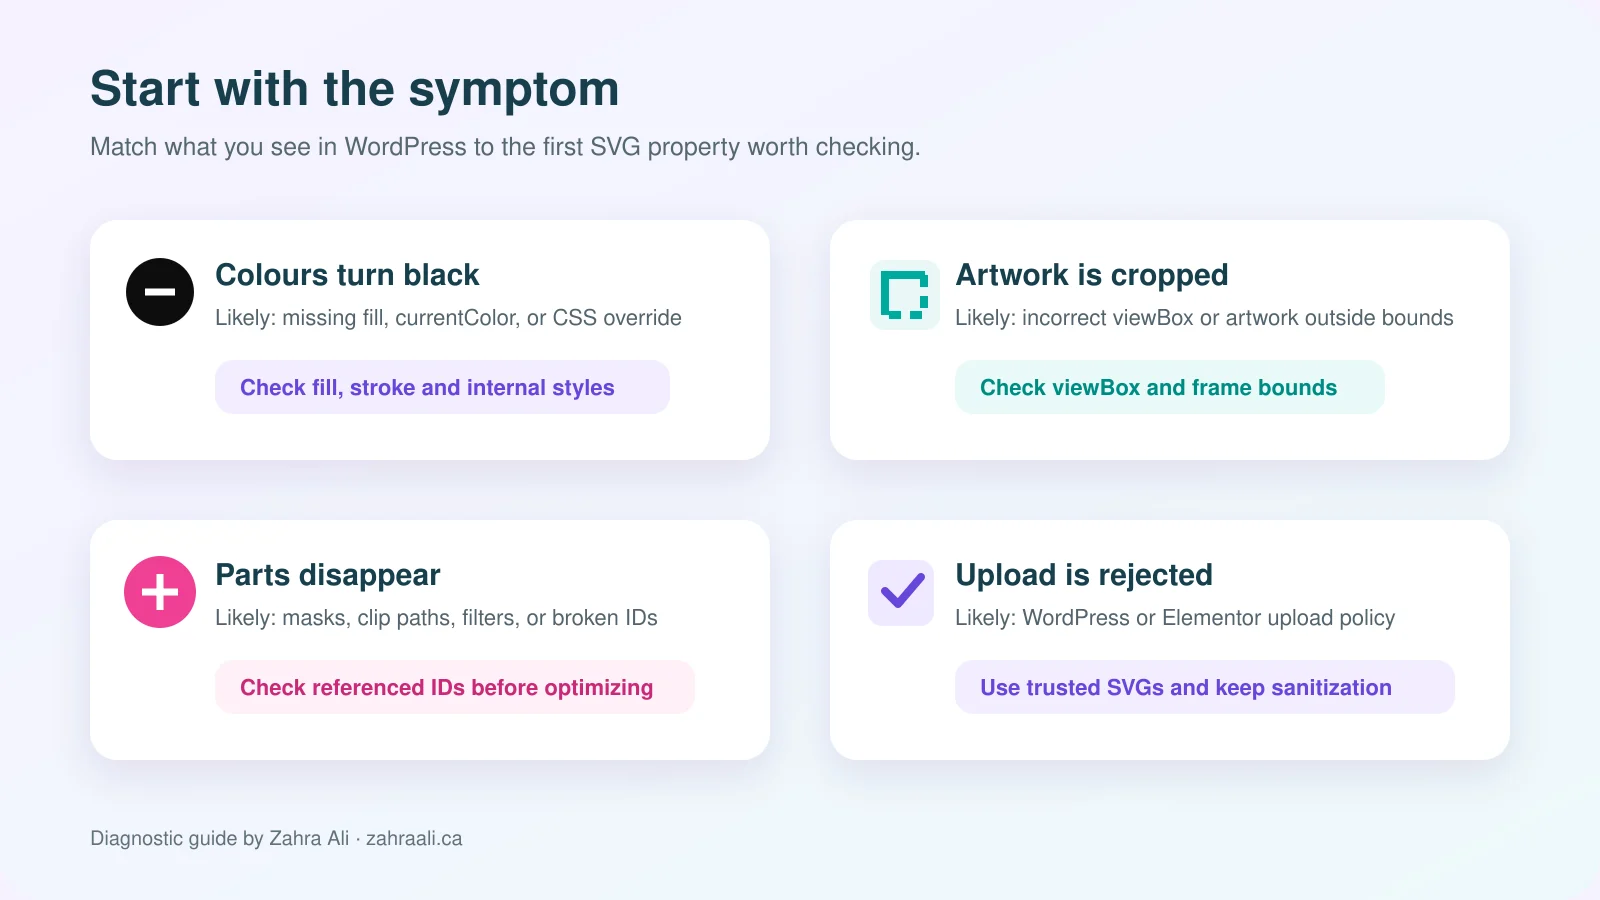
1. If the SVG turns black, check fill, stroke, and currentColor
SVG colours are instructions, not pixels. Shapes normally use fill for their interior and stroke for their outline. If a shape has no effective fill value, the SVG default can be black. MDN also confirms that a CSS fill property overrides a fill presentation attribute.
That distinction matters:
- An SVG inserted as an inline icon can be restyled by theme or widget CSS.
- An SVG loaded through an
<img>element is more isolated, so missing fills, internal styles, orcurrentColorare more likely suspects. currentColoris useful when you intentionally want an icon to follow the surrounding text colour. It is risky for a multicolour portfolio graphic because the result may become one colour.
Figma also notes that SVG export converts strokes to fills. That is normal, but it means the exported structure may not look like the original layer setup.
Practical fix: use explicit colour values for portfolio artwork, and reserve currentColor for icons that are intentionally theme-controlled. Re-export, open the file directly in a browser, and compare it with Figma before uploading again.
2. If the artwork is cropped or too small, inspect the viewBox
The SVG viewBox defines which part of the SVG coordinate space is visible. It contains four numbers: minimum x, minimum y, width, and height. If those bounds do not cover the artwork, the browser can crop shapes even though the SVG file itself is large enough.
This often appears as:
- a layout grid missing on one side;
- a button or label cut off at the edge;
- artwork centred incorrectly;
- the whole graphic looking tiny because the viewBox includes too much empty space.
Practical fix: export the final frame, not a loose selection containing hidden or off-canvas layers. Confirm that every visible object is inside the frame, then inspect the exported viewBox. Do not solve a bad viewBox by adding random CSS width or negative margins—the source bounds are the real problem.
3. If only some elements disappear, check masks, clip paths, gradients, and IDs
Complex SVGs can rely on reusable definitions such as gradients, masks, filters, and clip paths. Those definitions are connected through IDs. If an optimizer removes or rewrites a referenced definition incorrectly, a single part of the artwork can disappear while everything else remains visible.
This is also why optimization should be tested, not trusted automatically. SVGO is a respected open-source optimizer, but its own GitHub issue tracker includes edge cases where path conversion removed valid artwork. That is a reported tool issue, not proof that every optimized SVG is unsafe.
Practical fix: keep the original export, optimize a copy, and compare them side by side. If a gradient, clipped shape, dot, or grid line disappears, keep the tested original or disable the optimizer step that changes it.
4. If the background changes, decide whether transparency is intentional
An SVG canvas is transparent unless the artwork contains a background shape. That means the WordPress section colour can show through. This is helpful when the design should adapt to a section background, but it can also make pale lines or grids look missing.
On the Cybertivity portfolio item, the mobile grid and desktop colours had to be checked against the real section background—not only against Figma’s canvas. The correct test was the live page with the intended background.
Practical fix: if the section background should show through, remove the exported background rectangle and test the SVG on the final colour. If the artwork needs a fixed background, include it deliberately rather than relying on the Figma canvas colour.
5. If WordPress rejects the upload, do not bypass security casually
Elementor provides an Enable Unfiltered File Uploads option under Elementor settings. Its documentation also warns that SVG and JSON uploads can carry security risk. Elementor attempts to sanitize these files, but the feature should be used only when that risk is understood.
SVG is XML and can contain more than simple paths. That is why a random PHP snippet that allows every SVG is not the best first response.
Safer workflow:
- Upload only SVGs you created or reviewed.
- Keep sanitization enabled.
- Limit upload permission to trusted administrators.
- Avoid SVGs copied from unknown sites.
- Use a PNG or WebP fallback for a complex illustration that does not need vector scaling.
The export workflow I now use
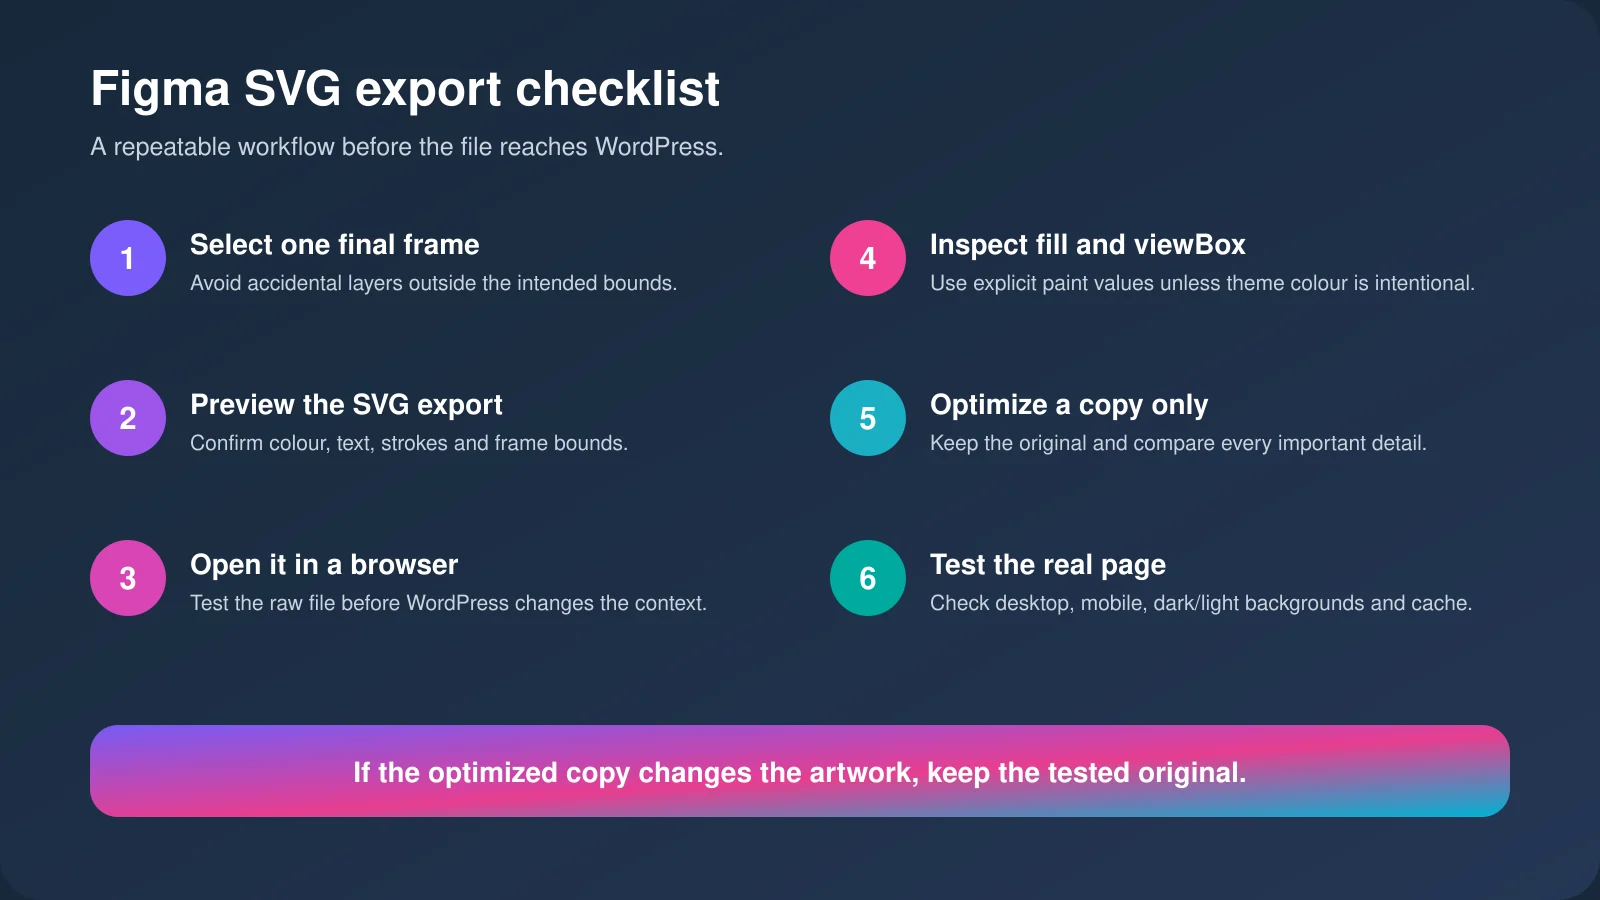
- Select one final Figma frame.
- Preview the SVG export.
- Open the exported file directly in Chrome or Safari.
- Check colour, transparency, viewBox, and missing elements.
- Optimize a duplicate, never the only copy.
- Upload the tested file to WordPress.
- Check the real page on desktop and mobile.
- Purge cache only after confirming the file itself is correct.
Real examples from my portfolio cleanup
The corrected design-system graphics for Melkart Group, OnePage Pro, and William Frenn now preserve their intended button styles, typography, and colour palettes. The Cybertivity layout-grid SVG required the same kind of careful live-background check.
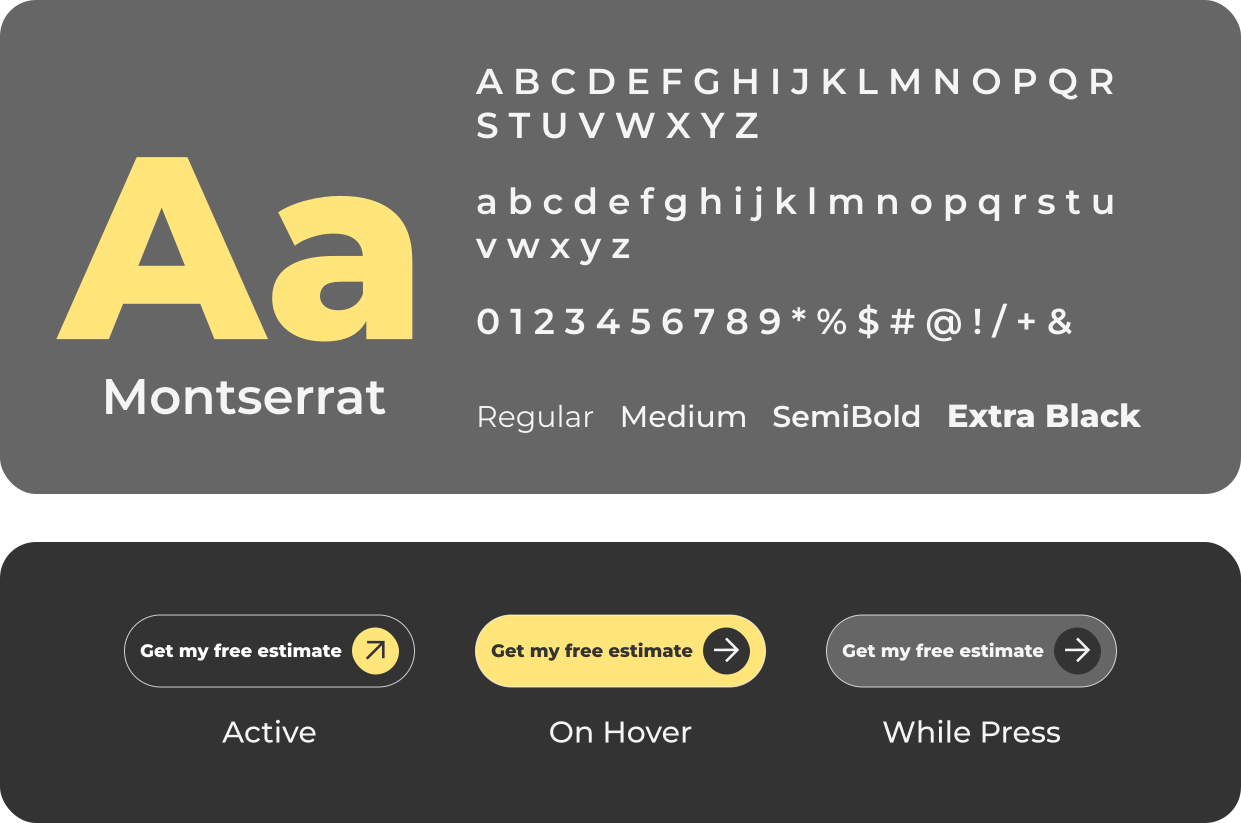
Real portfolio example: the corrected Melkart Group typography and button-system SVG.
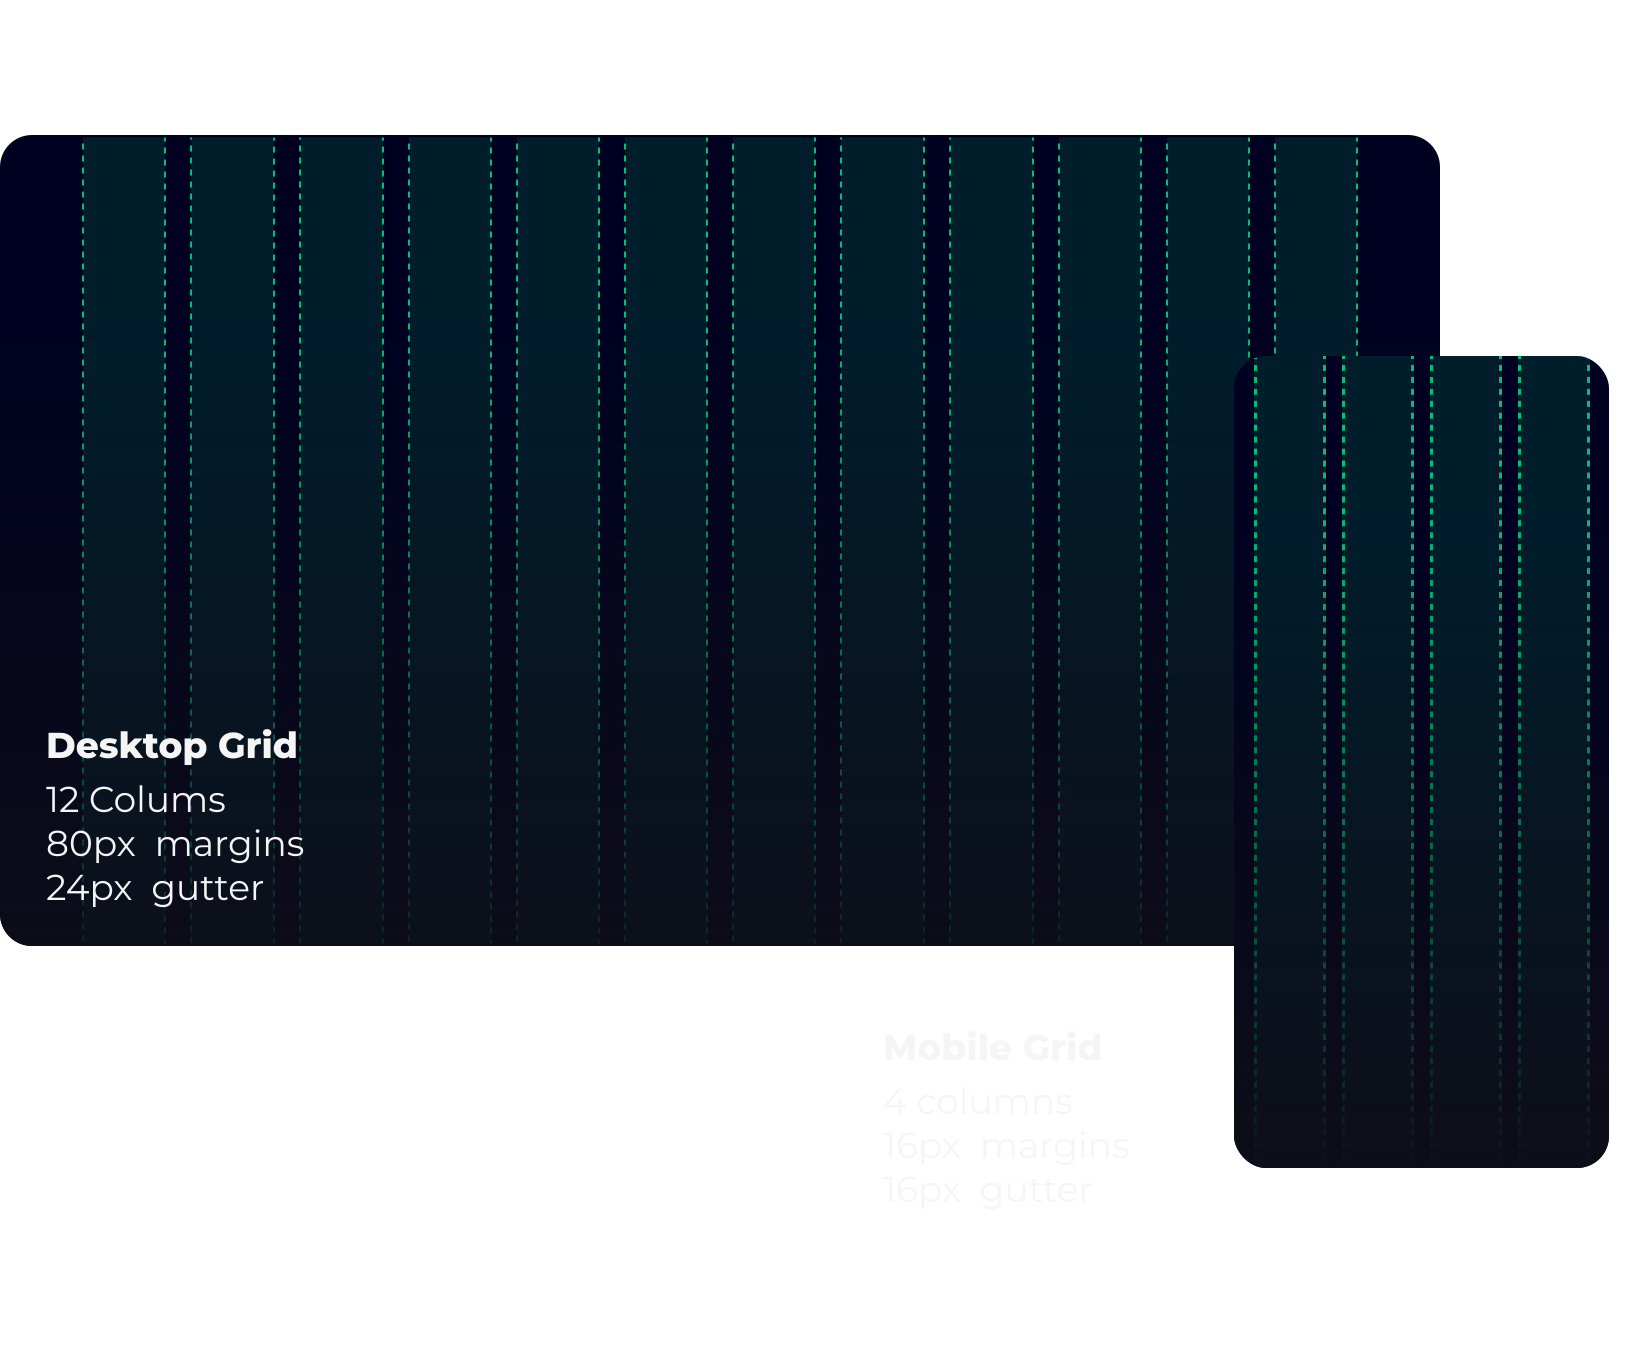
Real portfolio example: the corrected Cybertivity layout-grid SVG tested against the intended section background.
These examples do not prove that WordPress was the cause in every case. They show why the full Figma-to-browser-to-WordPress workflow must be tested instead of assuming that a successful export is a finished asset.
A safer Figma-to-WordPress SVG workflow
Do not rebuild the whole WordPress section when one SVG looks wrong. Diagnose the symptom, fix the source file, and retest the smallest possible change.
For most problems, the winning order is:
raw SVG test → fill and viewBox check → mask/ID check → WordPress sanitization check → live responsive test
That process protects the design, avoids unnecessary theme changes, and produces a reusable SVG that is easier to maintain.
Sources and useful tools
- Figma: Export formats and settings for static designs
- Elementor: Enable SVG support
- Elementor settings and SVG security warning
- MDN: SVG
viewBox - MDN: SVG
fill - SVGO on GitHub
- SVGOMG, a web interface for SVGO
Need help improving your website?
I can help with UX/UI, website development, SEO and performance improvements. Tell me what your website needs.